By far the most asked question we receive about Rise of the Drow: Collector’s Edition is, “Is it supposed to be this tough?”
The short answer is yes, it’s supposed to be a challenge. It’s a challenge for the players to use their resources wisely and to look outside their character sheets for ideas. But it’s also a challenge for the GM to keep the characters constantly in danger, constantly on the verge of defeat but also moving forward.
The first chapter of the prologue is called “The Darkness Arrives” and it is meant to set the tone for the entire campaign. The drow are introduced as a formidable foe, and the frantic pace and overall sense of encroaching darkness throughout the prologue compels the heroes to action and drives the players toward the quest of thwarting the drow. The prologue is not only difficult, but potentially deadly. While some groups embrace the idea of a TPK and enjoy the threat it poses, it’s not for every game table. What follows is a guide to avoid that most gruesome fate. Stop reading now if you want to avoid spoilers.
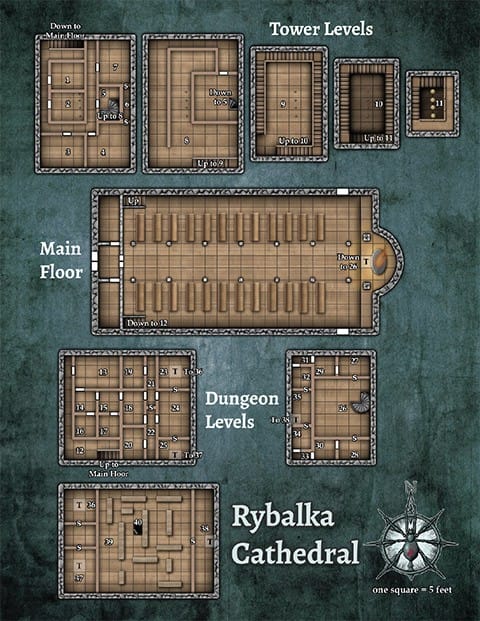
Within “The Darkness Arrives,” the action centers around the cathedral at Rybalka and takes place in three vignettes: the main hall or nave, the bell tower, and the reliquary or tombs. While the action moves quickly from one scene to the next, a careful consideration of all the elements involved will allow you to keep your players engaged without overwhelming them or breaking the sense of impending danger.
 The Main Hall
The action starts with injured adventurers, crazed hunters, and the corrupted summoning of one or more lantern archons. It is this last encounter that is the most notorious for being too difficult. Dark lantern archons are indeed a deadly encounter for a party of 1st-level characters, but this is the first test of their ability to use resources outside those printed on their character sheet, and your first test of walking the line between imminent threat and overwhelming odds.
Naught is Writ in Stone: Perhaps the most important thing GMs sometimes forget is that nothing is unchangeable. You know going in that the lantern archon(s) will be a difficult fight. If the two (possibly three) encounters before it went poorly for the players, or even if they spent a lot of resources, then you can take steps to make the fight less difficult without removing its tension. Reduce the archon(s) hit points by half. Or perhaps the archon, just as confused as everyone else by its sudden corruption, targets nameless NPCs every other round. One creative idea—posted to the AAW Discord— is to have the archon(s) revert to their normal state after losing a certain amount of hit points, and blessing the heroes with an aid spell after the fight.
NPCs (Fellow adventurers): Once the players expend resources helping the Gryphonwind’s Gatherers, they are (more or less) ready for round two. These adventurers could be simple allies that fade away after the events at Rybalka, or they can serve as cohorts or even alternate characters should one or more heroes fall in battle. The Underworld Campaign Primer provides more pregenerated characters to substitute for these adventurers, if appropriate for your campaign. Regardless of how you use these NPCs beyond their initial encounter, during the fight with the archon they can serve to give the party valuable time or momentarily capture the archon’s attention.
NPCs (Rybalkan natives): Other NPCs can serve this role as well, such as Mayor Leonid or Juriendor, though extra care must be taken when giving these characters the spotlight. The game should be about the player character’s rise to herodom. Using these more powerful NPCs to “even the score” early in a fight, only to be injured as the combat progresses, gives your players some breathing room without the NPCs stealing the show.
The Bell Tower
By the time the heroes begin to ascend the bell tower, they’ve survived anywhere from three to five encounters, the most notable of which was the hooded lantern archon(s). The mephits and storm crows that await them are not only difficult challenges in their own right, but they have the advantage of terrain on their side. But built-in to these encounters are some subtle (and some not-so-subtle) resources the party can utilize to their benefit.
The Acolyte: Just as the party begins to ascend the tower, an acolyte of the cathedral portends the dangers above. As the adventure notes, this acolyte can heal the party’s wounds if they have proven themselves deserving of aid. More importantly, the acolyte can direct the heroes to the cache of items in Juriendor’s Armory. Implicit in this information is that the party should take those items if they would be helpful; feel free to have the acolyte make that clear.
Mephit Motivation: The mephits almost certainly become aware of the party before the party becomes aware of the mephits, since the storm crows are positioned to delay the party’s ascent of the bell tower. But that doesn’t mean the mephits join the fray immediately; their mission is to burn the tower, not aid the storm crows.
Bellropes: These impromptu allies can be utilized as much or as little as the GM sees fit. If the party is having difficulty with the highly mobile mephits and storm crows, a few opportunity attacks or a grappling from a bellrope can help to even the playing field.
Juriendor’s Armory and other item caches: As noted on page 12, you are encouraged to place useful items around the cathedral for the players’ use. While the urgency of the moment might compel some players to simply forgo looting every footlocker and alcove, there is no reason a potion can’t roll free from its shelf during a fight to send the subtle message that the walls and rooms are not featureless. Similarly, friendly NPCs might point out that these resources are there.
Leveling Up: There are enough experience points to be earned in the bell tower to justify the party leveling up before they descend into the reliquary. Whether or not you pause the action and let the players level up their characters is a matter of personal taste. One alternative we’ve seen is simply starting the game with 2nd-level characters or running through an A-Series adventure in Rybalka prior to starting Rise of the Drow. Starting at a higher level allows the action to flow evenly and makes all the encounters that much easier.

The Reliquary
Most 1st-level parties will be near exhausted by the time they descend into the cathedral’s tomb. If your party has simply not met a challenge thus far, merging several ghoulblin/skeleton/zombie encounters will surely overwhelm them with opponents, which in turn allows the drow an easy escape. On the other hand, a party that is struggling and needs the help of pauses between encounters have already felt the daunting presence of the drow, even without facing them directly.
Encounter “Breaks”: By this point the party should have already deduced that the enemies they face are isolated encounters. Even if those enemies who spot the characters are not necessarily immediately concerned with fighting, each having missions of their own. In the case of skeletons, their specific instructions might prevent them from straying too far from a room or intersection. The dim-witted ghoulblins, too, might take their instructions too seriously to ambush at a specific location, instead lurking in the shadows even if fighting is going on just a few feet away. The tunnel spider, of course, protects the mouth of the drow escape route.
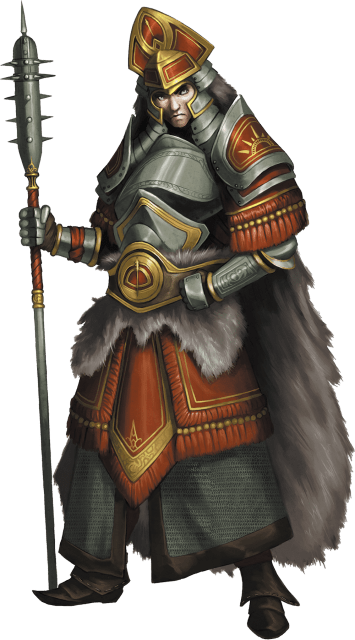
NPCs (Juriendor): Juriendor has forced his way through the reliquary as well but his exact predicament is left up to the GM. A struggling party might stumble across the injured high priest as he is accessing a weapon cache, or while he is attempting to bypass a trap. If it’s clear he is too weak to proceed, he might offer them the last of his magic before retreating, giving them just the boost they need to clear the tombs. Or he could be locked in battle with the tunnel spider, a fight he would surely lose if the party hadn’t arrived just in time.
Conclusion: These last few encounters are meant to be difficult and represent the drow way of waging war: let the fodder wear them down, only risk yourself when victory is assured. A “perfect” result at the end of the prologue is a party too weak to continue pursuing the drow as they escape into the forest, and the realization that this attack was no mere band of marauders, but a well-orchestrated act of aggression.
Get more out of your game: Are you a Gamemaster who wants to connect with others running this adventure and setting? Join our discussion on Discord and check out what’s pinned for some free Rise of the Drow content.